• Skip to main content
  • Skip to header right navigation
  • Skip to site footer
Umami Days

Umami Days

Meaty with a dash of veggies

  • Pick a meal
    • One Bowl Meals
    • Breakfast
    • Lunch / Dinner
      • Appetizers
      • Salads
      • Soups
      • Main Courses
      • Side Dishes
      • Sweets
    • Snacks
    • Drinks
      • Summer drinks
      • Cold weather drinks
      • Cocktail hour
  • Pick your protein
    • Chicken, duck & turkey
    • Meat
    • Seafood
    • Eggs
    • Mushrooms
    • Tofu
    • Vegetables
  • Pick your carb
    • Rice & grains
    • Noodles
    • Bread
  • Newsletter
  • Sidebar
    • Kitchen
    • Dining
    • Edible Garden
    • Food Tales
  • Newsletter sign-up!
  • Recipe index
    • By Meal
      • One Bowl Meals
      • Breakfast
      • Lunch / Dinner
        • Appetizers
        • Salads
        • Soups
        • Main Courses
        • Side Dishes
        • Sweets
      • Snacks
      • Drinks
        • Refreshing summer drinks
        • Cold weather drinks
        • Cocktail hour
    • By Main Protein
      • Chicken, duck & turkey
      • Meat
      • Seafood
      • Eggs
      • Mushrooms
      • Tofu
      • Vegetables
    • By Carb
      • Rice & grains
      • Noodles
      • Bread
  • Sidebar
    • Kitchen
    • Dining
    • Edible Garden
    • Food Tales
  • About
  • Privacy
  • Copyright
  • Contact
Kitchen Tools

How to use an onigiri molder

Published: 03.28.2021 » Last updated: 06.18.2022

How to make uniform-sized and shaped onigiri? Unless you’re a seasoned cook well trained in Japanese cooking, you use an onigiri molder! Here’s what it looks like and how to use it.

How to use onigiri mold

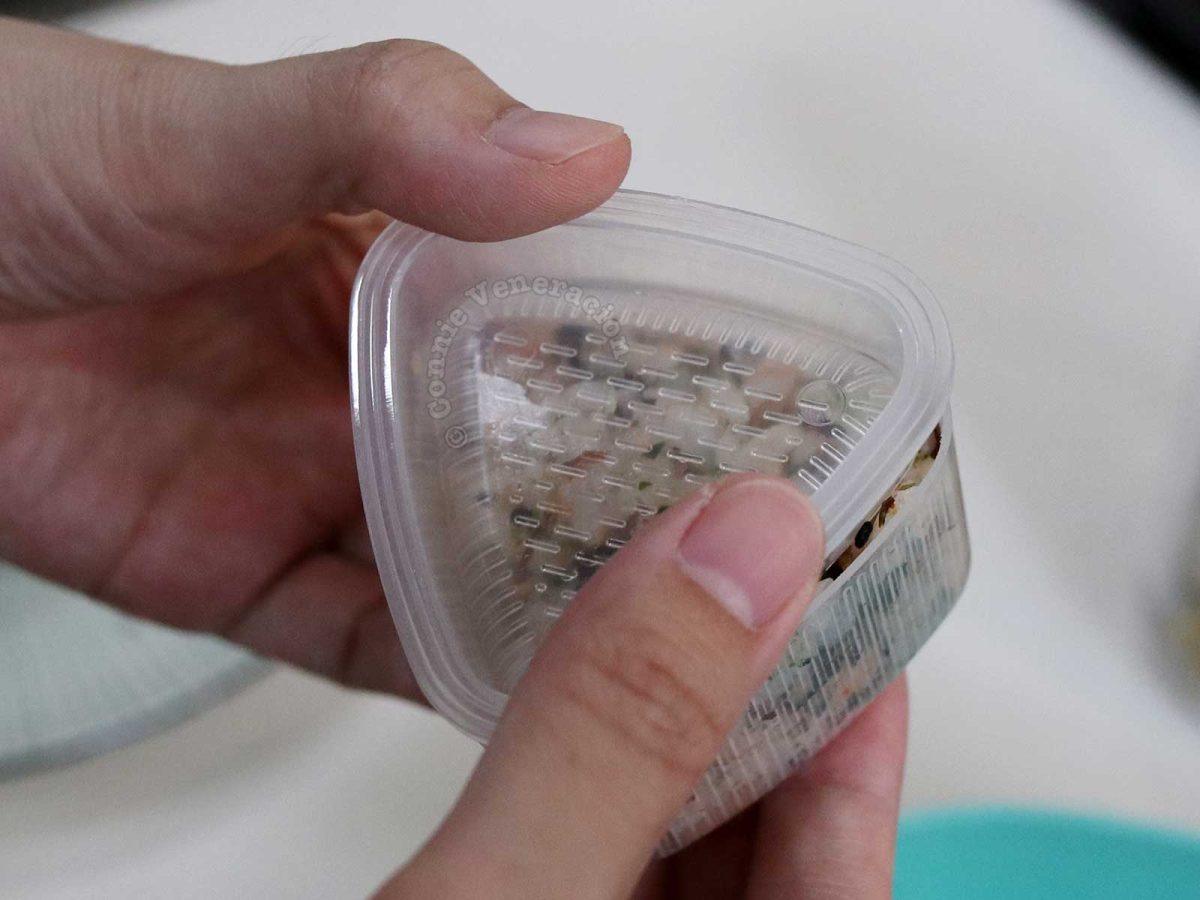
Onigiri molds (or molder) come in a variety of colors, designs and sizes. Some are smooth; others are ribbed. Some designs consists of two equally-sized triangular receptacles attached together on the side.

The onigiri molder we use at home consists of two unattached ribbed triangular receptables. The deeper (bottom) part is where we put the rice. The shallower (top) part is what we use to press the rice to make it compact.

Filling onigiri mold with rice

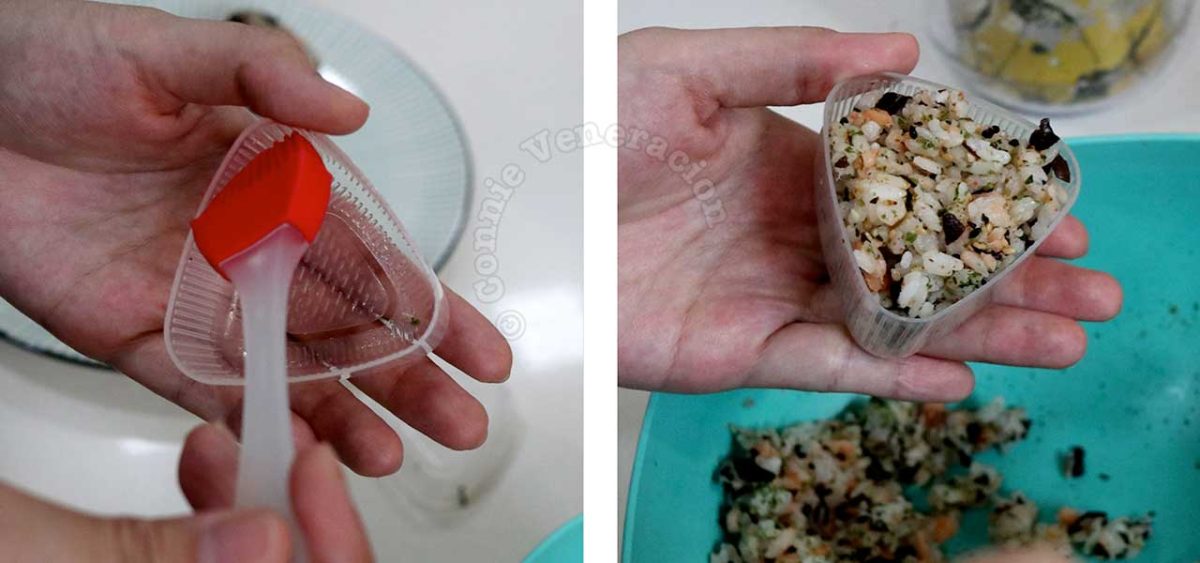
Before you start making onigiri, we brush the inside of the bottom part with water. That makes it easier to release the molded rice without risk of leaving some grains sticking to the molder.

Pressing and shaping rice using onigiri mold

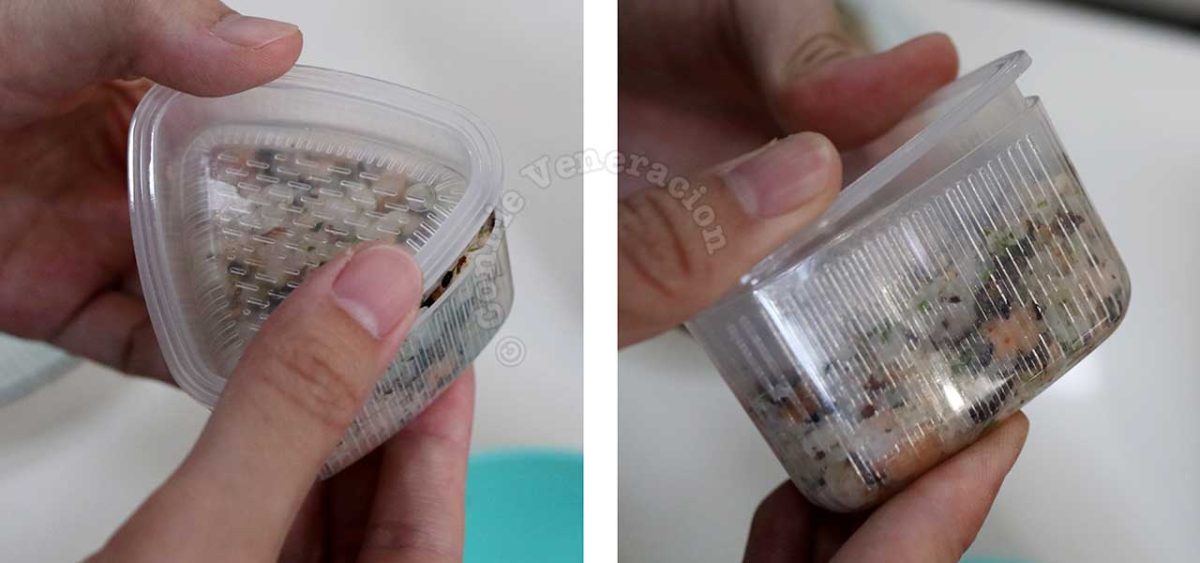
Then, we stuff it with rice. We fill it to the brim. The flat bottom of the top part of the molder is then pressed into the rice to remove air pockets and make the grains stick to one another better. The top part is removed, the part with the rice is inverted on a plate and the bottom is pressed to release the rice.

Sounds easy, right? It is. We should have bought onigiri molders a long time ago. Instead, we were so gung ho on shaping the rice with our hands and the results have been inconsistent. Sometimes, we manage to come up with onigiri that are of the same size and weight.

Other times, we mess up. But it’s hard to mess up when you have an onigiri mold. So, if you’re an onigiri lover, get a mold. Get two or more in different sizes, in fact. Onigiri molders are cheap, they are easy to wash and store, and they will yield a lot of onigiri before they need to be replaced.

Choose your onigiri

Bacon and wakame onigiri

Bacon and wakame onigiri

Yaki onigiri sprinkled with aonori

Yaki onigiri

Smoked Salmon and Furikake Onigiri

Smoked salmon and furikake onigiri

Sidebar

Connie Veneracion, Chiang Mai, 2020

Hi, I’m Connie!

Welcome to Umami Days, a blog that advocates innovative home cooking for pleasurable everyday dining. No trendy diets, no food fads and definitely no ludicrous recipe names like crustless quiche, noodleless pho or chocolate lasagna.

  • About
  • Recipes
  • Privacy
  • Copyright
  • Contact

Umami Days is powered by Apple, Canon, coffee & one bowl meals · Copyright © 2023 Connie Veneracion · All Rights Reserved