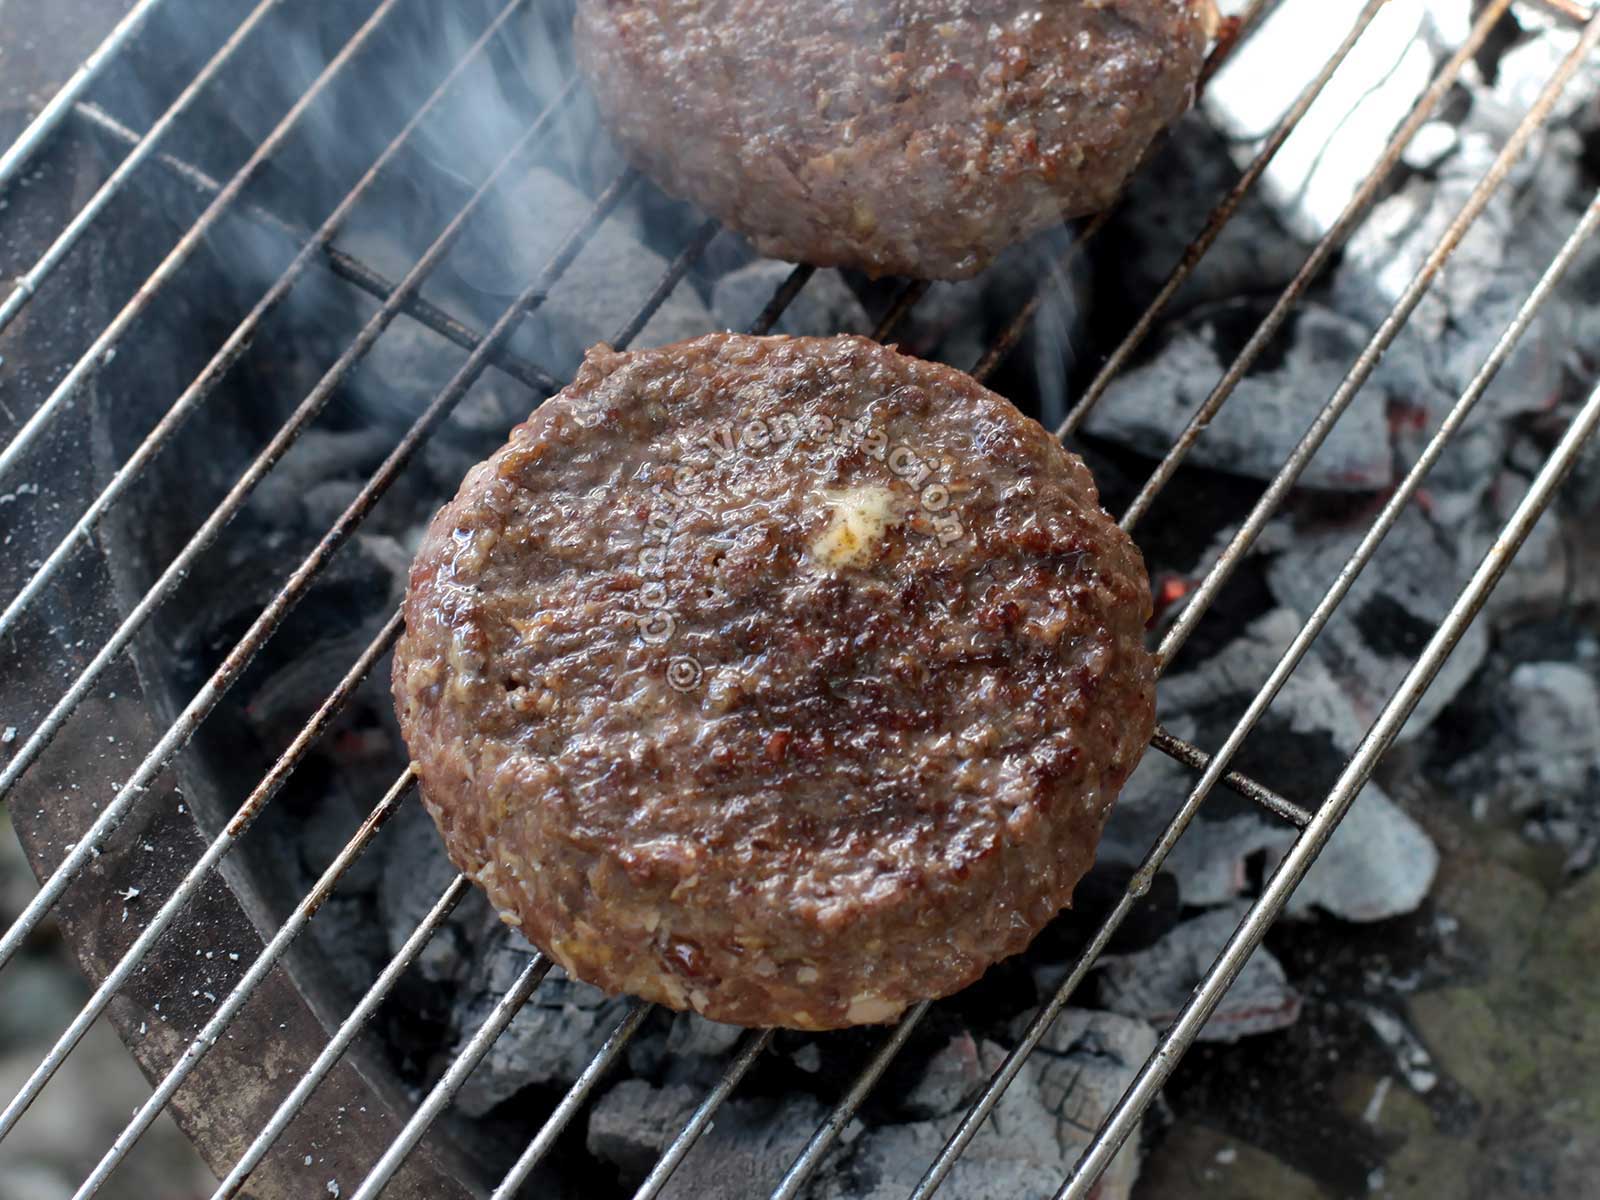
The sun is out, the backyard beckons, so it’s time to learn how to grill perfect burgers. You don’t need a fancy grill — just basic grilling techniques. I’m serious. You don’t need to invest on a fancy grill. For the past so many years, our outdoor grill has consisted of an old clay flower pot and a old metal rack. And we still manage to grill perfect burgers — charred outside, pink inside.
How is that possible? Because clay is a good material for cooking. If you’ve ever wondered why clay pots are still in use or why most outdoor ovens are made with clay (or bricks which are really blocks of clay), well, it’s because clay absorbs heat which makes it ideal for cooking food. When you use a clay receptacle for your charcoal, the receptacle soaks up the heat and retains it. In effect, you’re almost doubling the heat source.
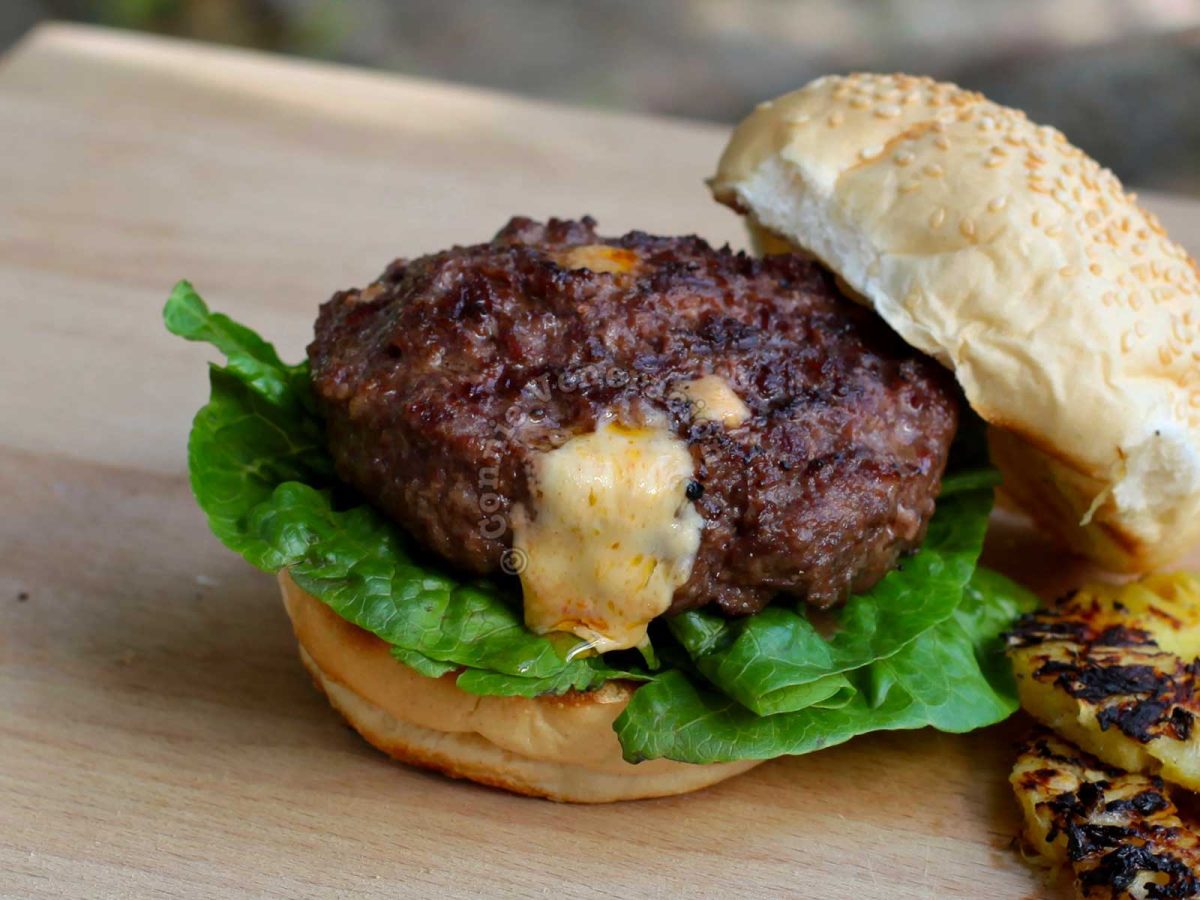
But, wait! Is that cheese oozing out of the burger? Well, yes, because these are cheese-stuffed burgers. We received that gadget for making stuffed burgers and, one day, Alex decided to try it out. She stuffed patties with her signature cheese pimento and grilled the burgers. The loveliest burgers we ever had, really, but this isn’t about making stuffed burgers. This is about grilling burgers.
So, here are my eight tips for grilling perfect burgers.
- Heat the grill. Whether it’s the stove top grill or a charcoal grill, I find it essential that the grill be very, very hot before I place the meat on the rack. Why? Because if the grill is not hot enough, the meat will just steam and your burgers will turn soggy.
- Brush the grill with oil. Three’s nothing more upsetting than having meat stick to the grill rack.
- Don’t overcrowd the grill. Position the patties so that they don’t touch one another (an inch apart will do; two inches, even better). It’s for air circulation and even cooking.
- Don’t place patties outside the perimeter of the heat because they are not likely to get sufficiently heat there.
- Don’t turn the meat too often. With burgers about three quarters of an inch thick, let them grill for about three to four minutes on one side, lift one side partially to see if the underside has charred sufficiently and, if it has, flip the patty over and let it grill for another two to two-and-a-half to three minutes on the other side.
- Don’t grill until the meat is dry. With burgers, as with steaks, the meat is supposed to be slightly pink inside. You’re grilling — not deep frying to makechicharon.
- Don’t press the meat into the grill and don’t poke the patties with a fork or a knife.I’ve seen a lot of people do this especially with burgers. Pressing down or poking the patties will make the meat juices ooze out. Why would anyone want to do that?
- While basting the patties is not essential, if you do like to baste, do it after the meat has charred.Basting sauces often include sugar among the ingredients and, if you baste too early, the sugar with caramelize and give the patties a charred appearance when, in fact, it is still severely undercooked.
Very important: Understand that the distance of the rack from the heat and the amount of coals glowing below the rack are the two factors that determine the grilling temperature. You need to have a decent distance between the coals and the meat to allow air to circulate. If the rack is too near the heat, the surface of the meat will burn before it is cooked through. If it’s too far (or if there isn’t enough glowing charcoal), the meat will not char.
My default setting is to place the rack six inches from the heat but that is a “more or less” setting depending on how much charcoal we have. It won’t hurt to do a test first with one patty. Depending on how fast and how well it chars, then, you can gauge if the settings are correct. Then, you can place the rest of the patties on the rack.
Much ado about grilling?
Personally, I hate meat that has dried up on the grill. Nine times out of ten, it’s bad grilling that’s the culprit. The excellent quality of the meat, the ideal ratio of fat to meat nor the accompanying basting sauce will NOT make up for badly grilled meat that has turned dry and rubbery.
So, remember, just because one can fire up a grill (even if it’s the fanciest grill in the world) and use tongs to turn meat or seafood over on the rack doesn’t necessarily mean that one knows how to grill. It’s like driving. Just because you can step on the pedals and know how to make the car move forward and backward doesn’t mean you really know how to drive.
Grilling is all about a nicely charred exterior and a succulent interior. If the inside is not moist and juicy, the grilling deserves a failing mark.