• Skip to main content
  • Skip to header right navigation
  • Skip to site footer
Umami Days

Umami Days

Meaty with a dash of veggies

  • Course
    • One Bowl Meals
    • Breakfast
    • Lunch / Dinner
      • Appetizers
      • Salads
      • Soups
      • Main Courses
      • Side Dishes
      • Sweets
    • Snacks
    • Drinks
      • Summer drinks
      • Cold weather drinks
      • Cocktail hour
  • Ingredient
    • Chicken, duck & turkey
    • Meat
    • Seafood
    • Eggs
    • Mushrooms
    • Tofu
    • Vegetables
    • Rice & grains
    • Noodles
    • Bread
  • Kitchen
    • How-tos
    • Ingredients
    • Tools
  • Subscribe
  • Food Tales
    • Edible Garden
    • Dining
  • Subscribe
  • Recipe index
    • By Meal
      • One Bowl Meals
      • Breakfast
      • Lunch / Dinner
        • Appetizers
        • Salads
        • Soups
        • Main Courses
        • Side Dishes
        • Sweets
      • Snacks
      • Drinks
        • Summer drinks
        • Cold weather drinks
        • Cocktail hour
    • By Main Protein
      • Chicken, duck & turkey
      • Meat
      • Seafood
      • Eggs
      • Mushrooms
      • Tofu
      • Vegetables
    • By Carb
      • Rice & grains
      • Noodles
      • Bread
  • Kitchen
    • How-tos
    • Ingredients
    • Tools
  • Food Tales
    • Edible Garden
    • Dining
  • About
  • Privacy
  • Copyright
  • Contact
Ingredients Kitchen

How to prepare wood ears and black fungus

Published: 05.07.2011 » Last updated: 10.20.2022

Until recently, I couldn’t tell the difference between black fungus and wood ear mushrooms when buying them in dried form. Actually, I thought they were the same. My, bad, right?

wood ears / black fungus

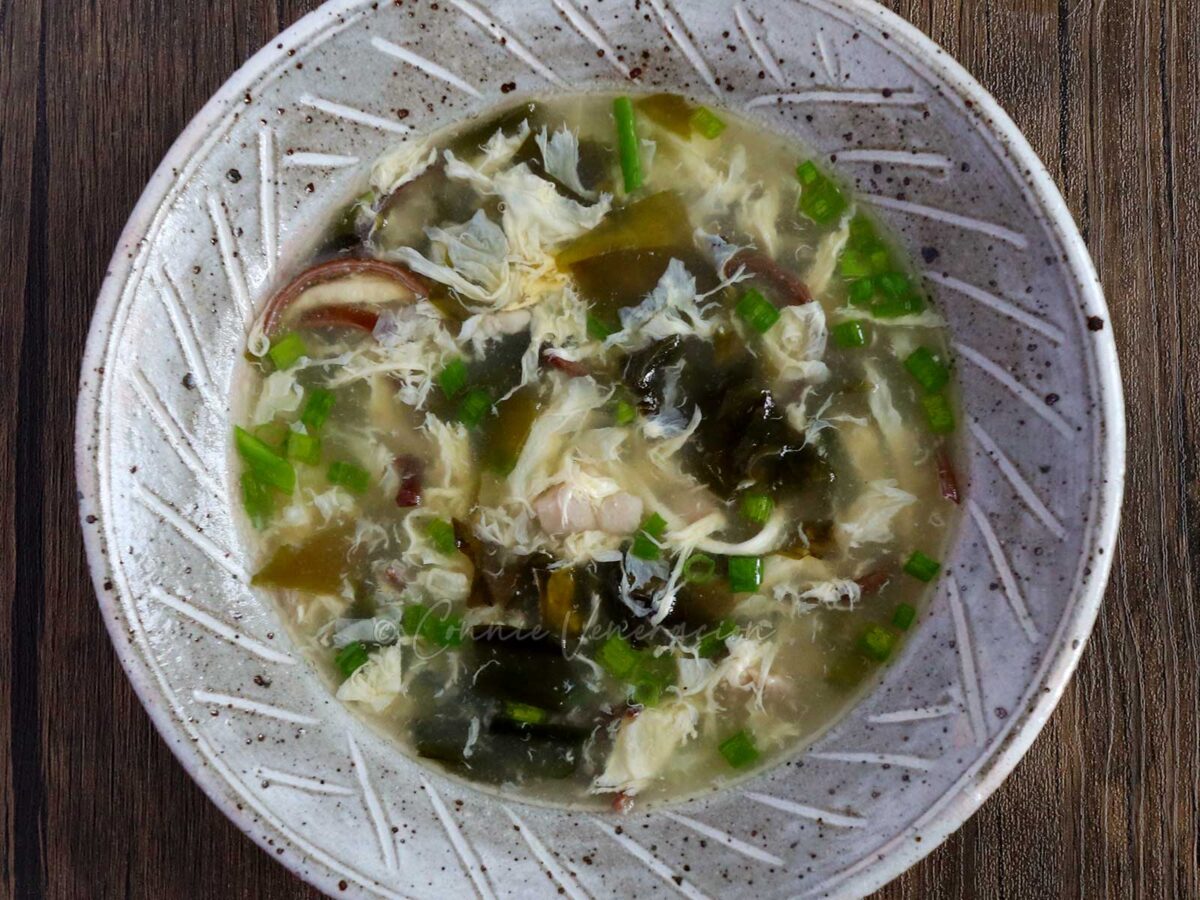
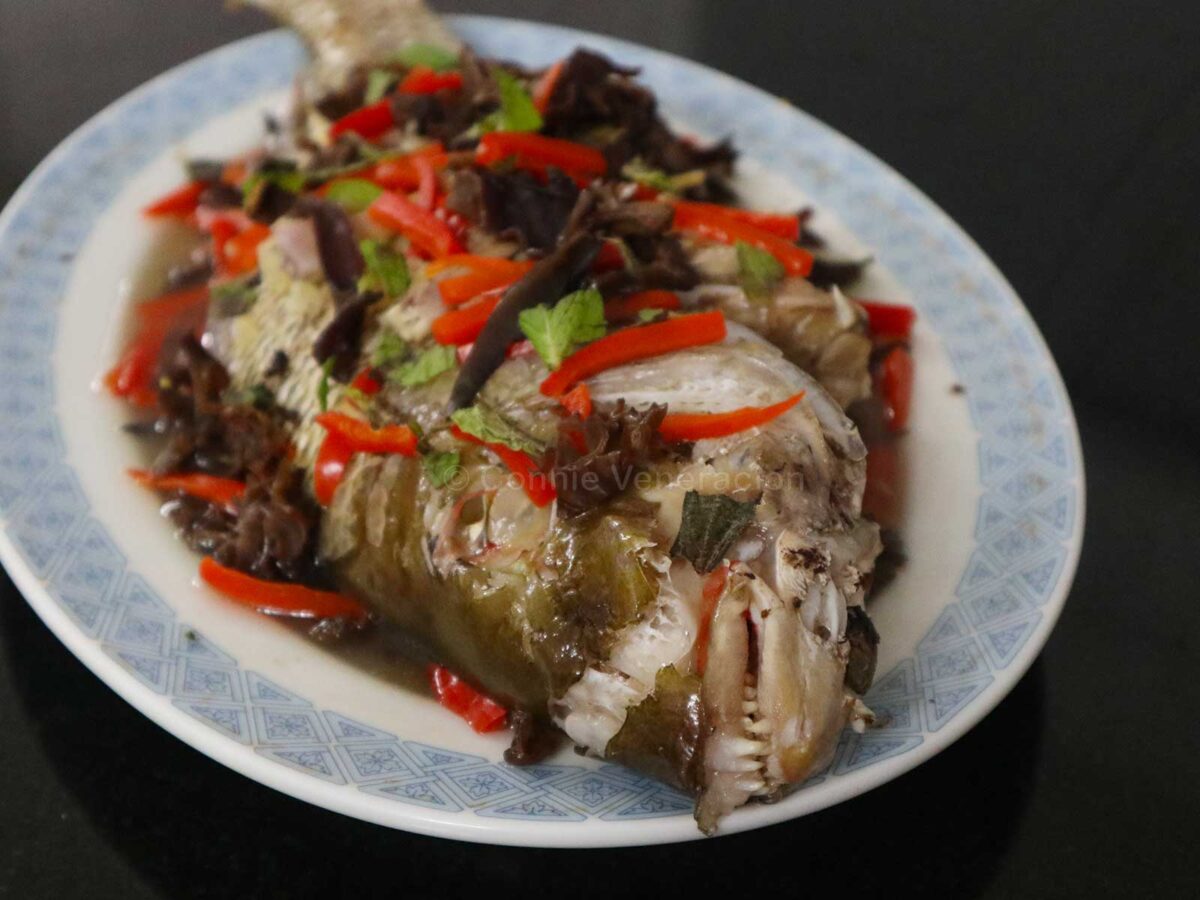
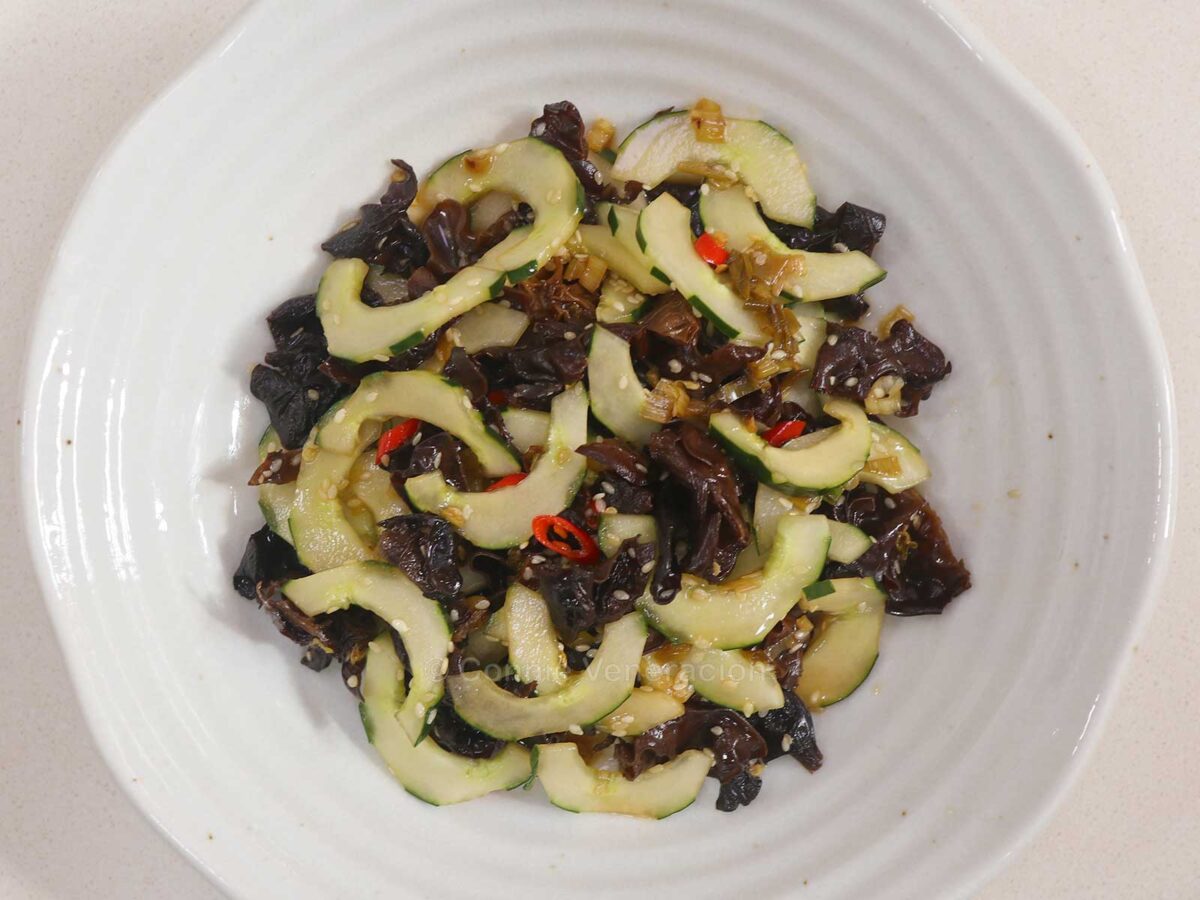
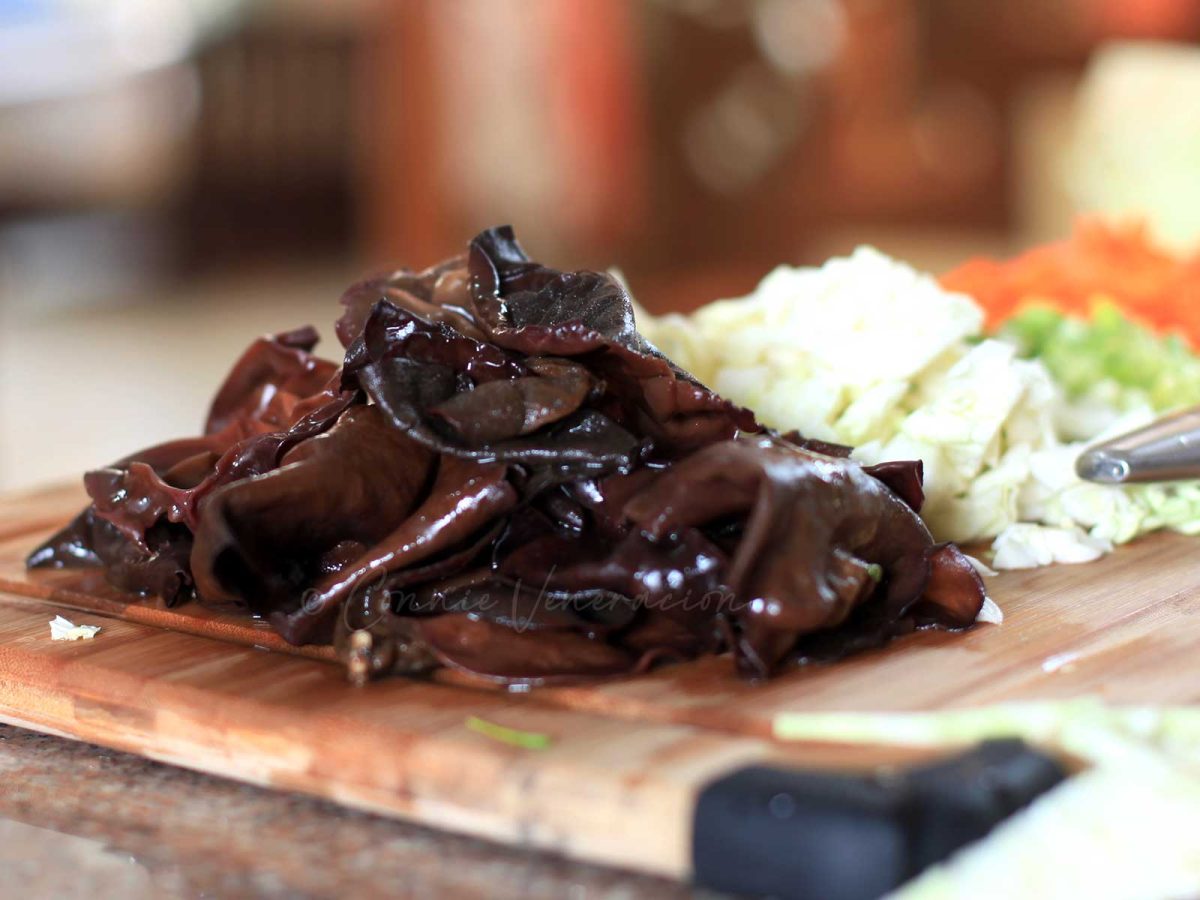
When dried, both are blackish curly things and it didn’t matter much to me which was which because black fungus and wood ear mushrooms are often used interchangeably in home cooking.

Then why does it pay know to the difference? Because dried wood ears require a longer soaking time and even fresh ones demand an extra step to make it palatable.

How to tell between black fungus and wood ear mushrooms

Dried or fresh, black fungus (Auricularia polytricha) are much smaller than wood ears. A dried piece is about half inch to an inch. They are also uniformly textured and thinner.

Wood ears (Auricularia auricula-judae) are about twice as large, thicker and there is a portion that looks coarser.

It’s not easy finding fresh black fungus and wood ears. But they are sold in most Asian groceries and markets in dried form. Note, however, that they may be called by other names.

The upside of buying them fresh? You don’t need to wait for them to rehydrate.

The upside of buying them dried? You can keep them longer. Just keep in a tightly covered jar then place the jar in a dry and dark spot in your kitchen or pantry. They will keep for a month or so.

Dried black fungus and wood ear mushrooms require rehydration

Whether it’s black fungus or wood ears, if you bought it dried, you need to rehydrate them.

Rehydrating dried wood ears / black fungus

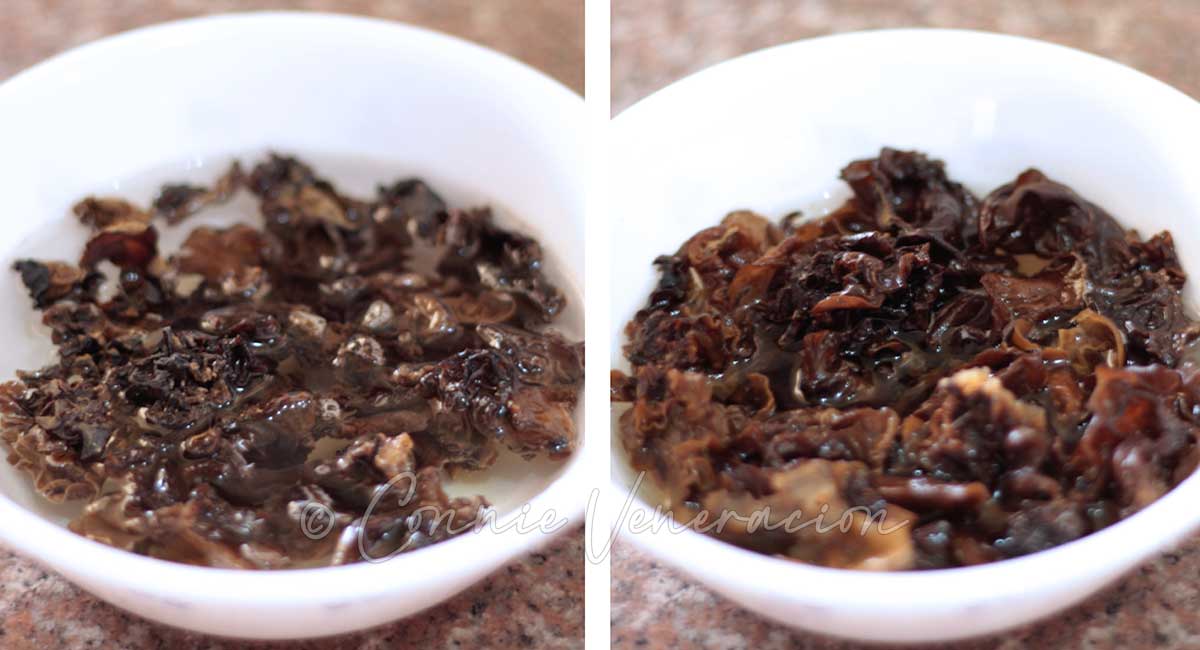
Place the dried black fungus or wood ears in a bowl and cover with plenty of hot or warm water. How hot? Not boiling. If you’re a mom and you’ve tested the temperature of your baby’s milk on your wrist, it’s something like that. The water shouldn’t scorch your wrist. Even room temperature water will do but rehydration will take longer.

How long should they be soaked? Black fungus will double in volume in less then 15 minutes. Wood ears will take twice as long. Longer, even, if they are large.

The soaking water can be strained and used for cooking

Trimming wood ears

Once the black fungus has rehydrated, you can use them whole or roughly chop them, thinly slice them, finely chop them… whatever the recipe calls for.

Wood ears, however, need trimming. Even if you bought them fresh, they still need to be trimmed.

How to trim wood ears / black fungus

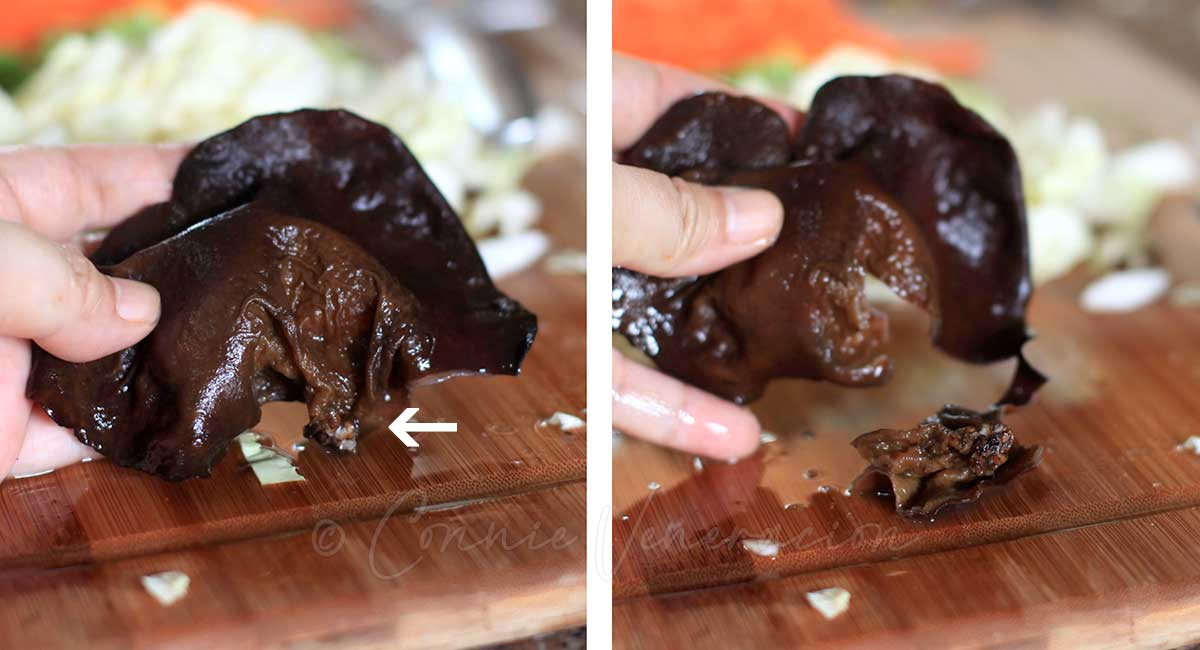
See where the white arrow points? If you feel around with your fingers in that part, you’ll know how much different the texture is from the rest of the fungus. That tough hard part should be cut off.

Take a small knife and cut around the tough portion of the black fungus, making sure that only the jelly-like portions remain.

After the trimming the black fungus, you can cut them into whatever size you prefer.

Connie Veneracion

Lawyer by education. Journalist by accident. Writer by passion. Photographer by necessity. Good food, coffee and wine lover forever. Read more about me and Umami Days. Find me on Flipboard, Substack and Pinterest.

Recipes and stories in your inbox

  • #40 A toast to the awesomeness of Filipino adobo
    09.18.2023
    No, Filipino adobo is an not adaptation of Mexican adobo. I’ll explain why. Plus, there’s a recipe for a not-your-usual Filipino pork or chicken adobo.
More Ingredients, Kitchen
Bitter gourd / melon (ampalaya)

How to minimize the bitterness of bitter gourd / melon

Fried quails

The secret to tender juicy quails

Left: wrong way to serve pasta. Right: correct way to serve pasta

How to serve pasta: sauce over noodles or noodles in sauce?

Homemade pesto with Pecorino

Homemade pesto

Boiled pork and vegetable soup

The smart way to reheat meat and vegetable soup

Fermented black beans (tausi)

Chinese fermented black beans (douchi)

Fully dressed beef tongue

Is it ox or beef tongue: buying tips, how to prep and cook

liquid smoke

What is liquid smoke? Is it safe to use? How is it used?

Fried dumplings on plate with dipping sauce

Does dumpling / spring roll meat filling have to raw before wrapping?

Jute leaves (saluyot)

Jute leaves (saluyot): Cleopatra’s anti-aging secret?

Dill growing in the garden

What is dill? Is it the same as dill weed?

The correct way to use an empanada maker / molder

The correct way to use an empanada maker / molder

Sidebar

Green beans tempura
  • About
  • Recipes
  • Privacy
  • Copyright
  • Contact

No AI is used in the creation of Umami Days content · Copyright © 2023 Connie Veneracion · All Rights Reserved